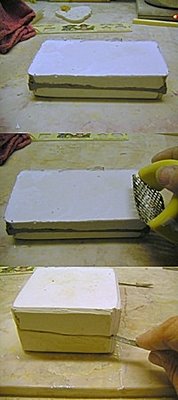
Once the heat has gone from the mold you can remove the boards and clay from the mold.
The top photo shows the mold after the boards have been removed.
Now you want to take the shaper tool again and file off the sharp edges of the mold. This makes it look nicer, its easier on the hands to handle it and it is easier on the rubber bands. You can see this process in the middle photo.
In the bottom photo you see me using a flat knife like tool (a butter knife works but don't use a sharp knife) to open the mold. Carefully push the tool into the V shape groove and gently twist it slightly. Do this again on the opposite corner. You may need to do it a few times and possibly on each corner before it will 'pop' loose. Be sure to hold the mold in your hand holding both pieces together when you do this so you don't accidently launch part of the mold. In the picture you see the mold on a table because I had to hold the camera. The photo only shows the angle and location to put the tool, it is easiest to hold the mold in your opposite hand (left if you are right handed) and use the knife with your right.
Once it has 'popped' loose put it on the table and carefully lift the top piece straight up off the bottom. Don't try to open it like a hinged box as this may result in chipping away bits at the edges of the cavities. If necessary you can hold it with one piece in each hand and gently rock it back an forth slightly to get it to slowly come off the model.
When you have it open carefully remove the model pieces and clean up the mold. Use the shaper to file the edge of the second half of the mold just as you did on the first half.
No comments:
Post a Comment